Battery cabling
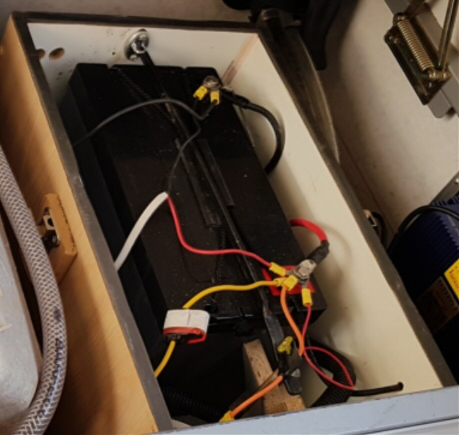
Is this your battery cabling?
If the battery wiring is from the factory or dealership, I'd almost guarantee this picture below reflects the size of cabling on your battery or batteries. This is the usual size of cable we see connecting batteries together on systems that we're going to replace with lithium. This is 12 gauge cable which is 2.05 mm in diameter.

Typical battery cable in a system we replace
It's almost industry standard, and for the life of us, we have no idea how such a low standard has persisted. We can only imagine that caravan and motorhome manufacturers haven't caught up to the idea that travellers are asking for more than a couple of 12 volt lights and an hour stop for lunch between caravan parks.
If you have multiple batteries, you now have a lot of stored amps, but you still have very low voltage to move those amps between batteries. This narrow gauge cable is simply not going to allow your connected batteries to evenly share the amps they have stored. And if they can't share the amps they have stored, one battery will work harder than all the rest until it dies.
If you have only a single battery, you're still asking for all your stored amps to overcome the resistance in this small cabling and make its way to your appliances under very low voltage. If you use an inverter and this type of cabling, you're in danger of overheating the cable. Also, let's face it, it's rather messy and unprofessional looking isn't it?
The cable you should have at your battery
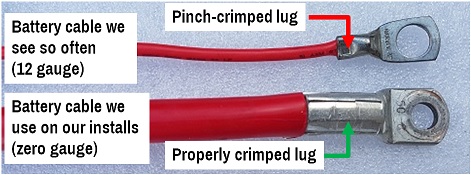
Let's take a look at the 'standard' cable we see used in so many AGM battery systems today, and what we believe should be used:


The 12 AWG cable we see so often in old battery systems is 2.05mm in diameter, 3mm square cross section.
The 0 AWG cable we use is 8.25mm in diameter and 53.5mm squared.
Thinking of changing to lithium?
If you're thinking of getting a drop-in lithium battery, you'll no doubt be told that you don't need to change anything. "Just take out your AGM battery and put in your new lithium battery."
The problem with this idea is that an AGM battery cannot give you current anywhere near as quickly as a lithium battery. If you don't change the way you use your power in your RV, you may not notice a problem. But when you charge your lithiium battery, whether via solar, mains or DC to DC charging, current will be accepted by your lithium battery far faster than it ever was accepted by your lead acid battery.
In a quality lithium system (and we sure hope you buy a quality lithium battery), you can draw the power out of the battery and put it back into the battery as fast as your inverter or charger can do it. You're no longer dealing with a sluggish AGM battery, and pushing big amps through small cable is asking for melted cable and possibly a fire.
If you're installing a lithium battery, please check your cabling. If we're installing a lithium battery for you we will definitely check your cabling and we'll almost certainly replace it.
If you're having trouble getting power from your lead acid battery, please check your cabling.
If you touch a cable going to or from your battery - or for that matter, anywhere in your RV electrical ystem - and the cable is warm or worse still hot, don't wait. Disconnect your battery and do something about your cabling.
The difference between cabling in an RV and a house
You might ask why the cable in a caravan or motorhome needs to be so much bigger than the cabling in a house.
In a house, you have high voltage. This means that the number of amps (or current) is relatively low. You can move low amps at high voltage through thinner cable than you can move high amps at low voltage.
In your RV, you have low voltage and therefore higher amps moving through your cable, especially if you are using an inverter to convert DC electricity to AC. High amps requires thicker cable.

Connecting cables with crimps and lugs
The good, the bad and the ugly of various types of connectors used in a typical RV.
The size of the cabling required to connect multiple solar panels and a close look at the MC4 connectors that come supplied with a solar panel, then on to the cable from your connected panels to a junction box and finally to your solar controller, including circuit breakers.